It’s time for Crafternoon!
If you’ve ever made a purchase from me, hopefully you received a thank you card from me. (If you didn’t, I will profusely apologize, though I try really hard to keep up with it.)
I do personally make the majority of my cards. I do have a dear friend that helps out too, and sometimes I force the kids to do crafts and make a few. 🤣 You’ll likely be able to tell if it was one that Nickster made. Tori’s, however, are often times even better than mine.
Today, I created some fresh cards using the following supplies:
So, grab your favorite deco and let’s craft!
Now that you’ve got your supplies, let’s chat strategy.
One thing I’m starting to do when I sit down to make the cards is to pre-cut papers to the right size. Depending on if I’m making note cards or folding cards, I might cut the card stock in a variety of ways.
For a Fold on Long Edge Card
Cut your card stock into two 5-1/2 x 8-1/2 inch pieces.
Score down the center at the 4-1/4 inch mark.
For a Fold on Short Edge Card
Cut your card stock into two 4-1/4 x 11 inch pieces.
Score down the center at the 5-1/2 inch mark.
For a no-fold note card
Cut your card stock into four 4-1/4 x 5-1/2 inch pieces. You can use either of the methods above, but instead of scoring, you will cut. 😉
Now that you have your base…
it’s time to cut the pretty papers!
I generally just make a solid piece to go in the center of the card front. If you’re planning to do this, choose your paper(s) and cut four 4 x 5-1/4 inch pieces.
If you want to do fancier designs, you absolutely can do that! In fact, I’d love to see what you create!
Now the fun part!
The fun part is actually laying out the designs so you can see what you like BEFORE you glue anything down!
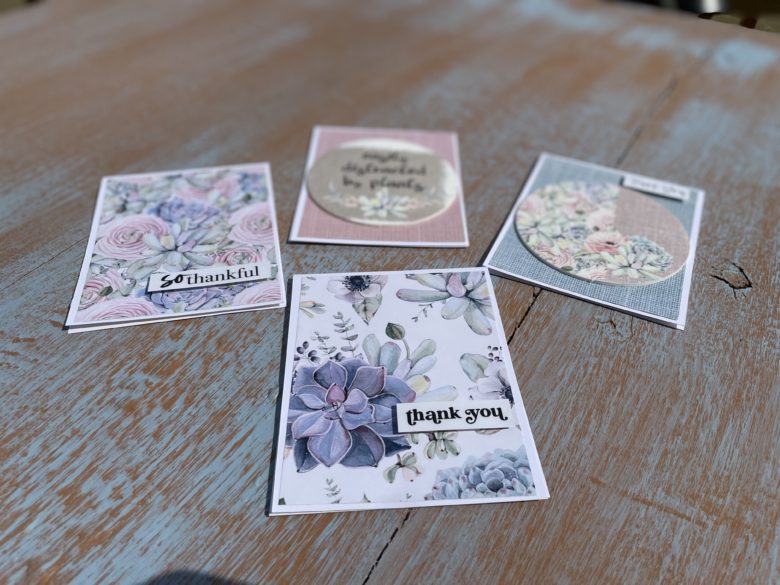
For these cards, I used a couple of coasters to decorate the front, along with the thank you sentiment sticker sheet.
For the stickers, I placed them on white card stock first, then cut them out. The then used craft foam squares (I don’t know what they’re really called) to help the words pop off the cards and add some dimension. I used washi tape to connect the coasters to the card so that they can be easily removed!
Time to assemble!
Once you’re satisfied with your designs, it’s time to assembly your cards! Use your favorite craft tape or glue to attach your pretty paper to your base card, then affix any die cuts, stickers, or other decorations. Voila! You’ve got your cards!
Here’s what I created with mine! Let me know what you think!

